Monday, 15 July 2013

Holiday Snaps //Tunisia '13


 So a couple weeks ago I was in Tunisia, enjoying the wonderful sunshine, drinking cocktails, lounging by the sea/pool and just having one of the most relaxing weeks of my life. Although I did take quite a lot of photos, I honestly didn't really take much care and I mean that in the sense that they are mostly silly ones of us (Myself, Maria and Emily, the lovely ladies I went on holiday with) or the pool or just not very good photographs. I honestly was too busy being relaxed or having a nice time and forgot to try and get some really good photography but I though I would upload a few anyway just to share my holiday experience with you.


The holiday was lovely and relaxing as well as fun because of the excursions we were able to go on and explore the country a little more. The people working at the hotel were lovely and fun and there was never a dull moment. As much as this was a relaxing and wonderful holiday, I definitely learnt that I am more of an exploring/festivaly holiday kind girl. Never the less this definitely something that would do again, just maybe when I'm a little older. 


On our first day, lounging around the pool.

The view from our hotel bungalow.


Huts at the  Friguia Animal Park.

Me riding a camel! 

Zulu dancer at our dinner. 

Tunisian dancer. 
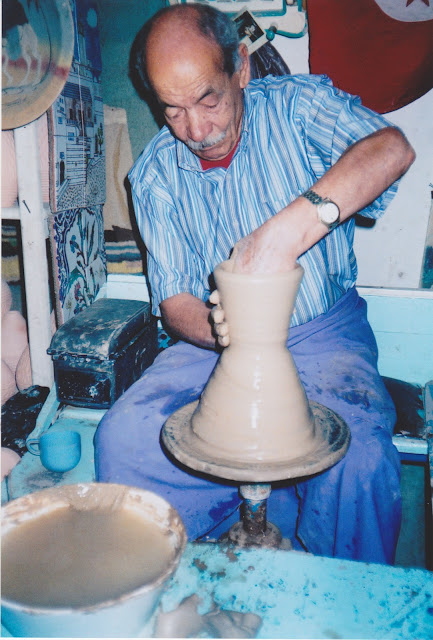
Authentic tunisian pottery. 


Market Fever: Africa's largest street market. 

If I had enough room in my suitcase one of those lanterns would have been mine aha!


The view at wine tasting, we may have gotten a little carried away!

Maria, myself and Emily.  
And thats all folks, I hope enjoyed this post. I am going to try and upload some more life and arty posts soon! 

Saturday, 6 July 2013

Getting back into the swing of things.


I need to get back into the swing of doing things, creating and making and although these look like nothing and aren't particularly good it's a start.  I wanted to look at textures and layering, I'm really into collage work and mixing textures and medias and took this outside. I cut up a image found in a magazine and started placing it on different textures in the garden. Its rather odd but I personally really like how they look together and contrast of colours and textures. They aren't much but I thought I would put them up anyway. 

Thursday, 4 July 2013

Emma Makes...


So today I decided to be productive, get the fabric box out and make a cushion cover. Now recently I become very obsessed and very interested in home interior and am constantly on the look out for something nice for my own room/house but being a student this is pricey and thought why not just make my own. So here we go, 7 basic steps to making my very easy cushion cover.  


1. Making the templates, I made mine just by sticking a couple pieces of paper together with tape, to make a 17inch by 17inch square piece of paper, this is so I have an inch all the way round to give room for sewing. (The cushion size is 16' x 16') 


2. This is simple, pinning together the templates to the fabric and cutting around them to get rid of any excess fabric. 


3. Pinning a fold for the overlap at the back of the cushion. (This is where you will put the cushion inside, this is optional). 


4. Pinning the two panels together leaving an inch from the end. 


5. Using the sewing machine and which ever colour thread you see fit, sew together the panels. 


6. On the overlaps sew 1/2 popper onto the fabric, this is also optional. This is just to keep the cushion inside the cover.  


7. Again this is optional, I just added a nice yellow button to the back of the cushion for decoration. Then all you have left to do is place your cushion inside the cover and your done. 


I'm planning to get some more material soon and make a few other designs and hopefully try and sell a few. I think something like this would make quite a cute gift or even just something nice to brighten a room. Nice, cheap and easy. Done!